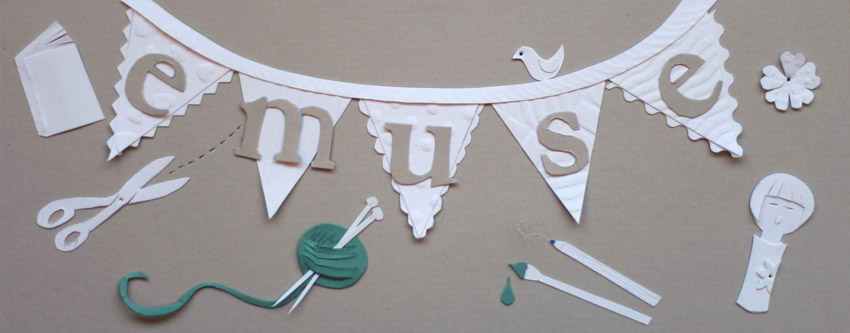
31 March 2015

This month on emuse


It's been a bit of a quiet month here on emuse. Last month I had started decorating my bedroom, and it's been taking a while, so I've been busy doing that (and my craft room has been overflowing with all the things I took out of the bedroom while I was decorating). I also had a particularly nasty cold, so I've not had much creative energy.

There have been some simple craft projects this month:


I've shown you some work in progress:

And there were some other random posts, about the city walls of Xi'an, reviews of the book Horrorstor and of The Life-Changing Magic of Tidying, and posts about keeping a diary, cherry blossomsmoothie hats and lavender bags. And, since I was not feeling well, I shared some ideas of crafts to do when you are under the weather.

I'm hoping that I'll manage to get more crafty things done next month, and I'm looking forward to showing you my finished bedroom soon! Here's another photo of me at my new favourite age of 44, with cards from my old favourite age!

30 March 2015

This month I have been mostly...


Eating:
Soup. Roast potato pieces with lemon, garlic and rosemary. Haggis. Pie and beans on Pi Day. And French toast nearly every weekend!

Watching:
Indian Summers.

I caught a really nasty cold at the start of the month, so I've been taking things a bit easy (other than decorating my bedroom!). I was off work ill for a day, and if I hadn't felt so ill I would have really enjoyed spending the snowy but sunny day in bed in my freshly (almost completely) painted bedroom. Got my braces adjusted on my birthday, when I turned 44, which is the best age ever! I loved being 4, and it has been my favourite number ever since.

29 March 2015

Another bunting card

Here's a variation on the bunting birthday card I made last month.

This time I used shades of blue and green, made all the pennants the same design with the striped triangle stamp, and used my Pilot Parallel Pens to add lettering in the same colours.
This is a really easy and versatile card design, and I can see me using it a few times more this year!

27 March 2015

Neon hair grips

I am maybe possibly perhaps beginning the journey of growing out my fringe! It started with laziness, because I'm decorating my bedroom and my hair cutting scissors are buried somewhere in the mess of bedroom items in my craft room, and continued when I saw on Pinterest all the cute hairstyles that were possible for a growing-out fringe!

One thing I really wanted to try was making a statement of my hair grips. So I went shopping for some neon hair grips, and couldn't find any! I ordered some online, but decided to have a go at making my own while I was waiting for them!
All you need for this project are hair grips, nail polish and a piece of card!

1. Place the hair grips on the card.
2. Paint the surface of each hair grip with nail polish.
Now you can customise hair grips to match every outfit! In fact, I'll maybe make some to match the coloured elastics on my braces!

25 March 2015

Map chest


As part of my bedroom makeover, I decided to give this little chest of drawers a makeover, with a bit more of a vintage look.

Here's what it looked like originally, a very plain Ikea Moppe chest:

And more recently, with patterned papers applied to the fronts of the drawers:

I wanted a darker wood look to go with some of the other items I was putting in the bedroom, so I decided to first of all stain the outside of it with the same dark wood stain I used for my Japanese drawers. I then used some beeswax polish on it.

I didn't feel that pink and green were colours I would be using much of in the bedroom, so I thought about what paper I could use instead. The great thing is that the drawers have finger holes at the back too, so I was able to turn them around in case I ever wanted to go back to the pink and green.

I decided that map paper would fit the vintage look I was going for, but I wasn't sure I had any left from a map of the world I'd used for various other projects. Luckily I found that I did still have some, and it was just enough, although I did have to create joins in the paper on the two wider drawers.

I cut the paper to shape, and mod podged it in place. When it had dried I sanded around the edges slightly.

The finishing touch was to add label holders that I'd salvaged from an old piece of furniture that was being thrown out at work. I taped these in place so I could drill the holes in the right places.
I cut up an old envelope to create the labels, and stamped them with numbers.


23 March 2015

Antiqued letter E

I'd bought this black plastic letter E at Remake last year, without any real idea of what I would do with it, but when I was planning my gallery wall (as part of my bedroom makeover) I decided it would fit in well there.
Since it was black plastic, I thought it needed a bit of paint treatment before putting it up on the wall. I grabbed some copper spray paint and started painting it, but realised halfway through that leaving some of the black showing would look quite cool, so I stopped at that point.
To hang it on the wall, I wound wire around the little plastic posts on the back of it, then added hot glue to secure the wire.

21 March 2015

Crafts for when you're feeling unwell


A recent bout of the cold got me thinking about what crafts are easy to do in bed when you are not feeling well! Here are some of the ideas I came up with.

Sewing is a good choice, expecially if it's a project that you've already started (saves having to get out of bed to cut out the material). So continuing a bigger project like a patchwork cushion would be a good idea, and is exactly what I did. Or you could mass-produce some felt brooches. Just be careful not to lose the needle or pins in bed!

Crocheting is one of my favourite crafts to do in bed, and you can even do it from quite a horizontal position if you don't feel up to propping yourself up with pillows. Granny squares or granny hexagons are light and portable, and it doesn't take long to do one in between naps. Try making this granny hexagon cushion, for example. Knitting is also an option, but needs more of a sitting up position.
If you work on a tray, you can do some simple paper crafts, like these cards, or a bit of origami  (using the pages of some magazines that are probably strewn around you anyway, if you're anything like me when I'm ill). Drawing is another simple thing to do in bed. You can either do drawings of the things around you, or make sketches of your ideas for upcoming craft projects.

You could bend some pieces of wire to make earrings or a hair comb, but leave the addition of nail polish to these until you're back at a desk!

If you're not feeling up to crafting, you could read a good book, watch some of your favourite TV, or write a diary. Look after yourself if you're feeling ill, get plenty of sleep, and you could also try one of my favourite cold remedies!

19 March 2015

Bedroom before

I thought I'd share with you some photos of how my bedroom looked before I started decorating it, in preparation for the big reveal of how it looks after its makeover!

When I moved into my house, the ceiling was pale blue, the top part of the walls a golden colour, the dado rail dark wood, the bottom half of the walls a dark blue striped wallpaper, and the carpet navy blue. Slowly I lightened up each of these elements, starting by adding a cream carpet, then painting the top half of the room cream and the bottom mint.
I was really happy with how it turned out, but after many years the time has come for a change. I've been looking at lots of photos of white bedrooms, and that's what I've spent the last month or so transforming my bedroom into. I feel that having the same colour over the whole height of the walls and the dado rail will make the room look less cluttered, too.

I was fairly happy with the layout of the room, so I haven't changed much as far as that is concerned, and I'm keeping the same furniture, but I've lightened and brightened it with lots of white paint. I'll be revealing how my redecorated bedroom looks very soon!

16 March 2015

Mackintosh Mothers' Day card

When I was looking for inspiration for a card for Mothers' Day, I had just found a book on Mackintosh textile designs in a charity shop, and this reminded me of my Mackintosh triangle stamps, so I decided to use them to create a design for my card.
I used almost exactly the same design that I'd originally stamped in yellow, and used for my phone case, but changed the colours to use pink, green and black, which were the colours of the image on the cover of the book I'd bought. Finally I added a Glasgow rose to make sure the Mackintosh theme was obvious!

15 March 2015

Book review: Horrorstör

Horrorstör by Grady Hendrix was a fun little read, about the workers in a furniture store who stay behind after hours to investigate some strange goings-on. I'm not a big reader of horror stories, but this one was not too gory, and I enjoyed reading it.

The setting of the book was easy to visualise, because it was set in a very Ikea-like environment. So at each twist and turn of the plot I could picture exactly what the setting looked like.

The really unusual thing about the book, though, is its design, and this is why I bought it as a paperback rather than a Kindle book. The book looks almost exactly like an Ikea catalogue. I thought that this would just be the cover design, but in fact it is carried through the whole book, with furniture illustrations relating to the plot at the start of each chapter. Some of these were of items of furniture I wished existed, and others of items I'm glad don't!

The book was a really fun quick read, and I hope that other book designers will take heed of its success and come out with other innovative designs.

14 March 2015

Innocent smoothie hats

For the past few year I've been searching in vain for Innocent smoothies with hats on (they do it once a year for charity), but this year I've finally had some success. I found the last one in Boots one week (the yellow and blue one), and then the next week I happened to be in Asda when there must have just been a new delivery - I struggled to choose just two! And I heard many other shoppers exclaiming with joy when they saw them just as I did (admittedly most of those shoppers were children!).

I finally chose an amazingly cute pineapple hat, and a raspberry-pink hat with a tiny stripe around it and a huge fluffy pompom on top.

The hats are ever so slightly large for Petite Blythe dolls, but depending on the hat they sometimes work. And they also make cute hats for my kokeshi and Momiji dolls! It's also fun to see all the different designs and take inspiration from them.


13 March 2015

Retrocraft: Lavender bags

While I was tidying I came across some of these lavender bags languishing at the bottom of my underwear drawer! Now that the drawer has been tidied, they are in a much more prominent position.
Two of these, the white ones with embroidered flowers on them, were made when I was a teenager, so they are very retro!
And the fat fluffy cat one is even older - my childhood friend Claire bought it for me as a tenth birthday present. It's long since lost its scent, but I love it so much that I'd never throw it away.
The others, the blue bag and owl, were made a few years back from lavender that my brother and sister-in-law brought back from their holidays.
Lavender bags are really easy to make from fabric scraps, and are a great sewing project for a beginner. I think that the blue one is the most successful design, because the ribbon can be untied and the bag refilled when the lavender has lost its scent.
Related Posts Plugin for WordPress, Blogger...