31 July 2014

This month on emuse

This month on emuse has been Mackintosh Month, a month of posts about the Scottish architect Charles Rennie Mackintosh.

The month started off with an introduction to Charles Rennie Mackintosh, a drawing and photos of the aftermath of the fire at Glasgow School of Art, and a discussion of Japanese symbolism in his work.

Later there were some drawings and photos of the Willow Tearoom, and a visit to a grave designed by Mackintosh.

There have been plenty of creative projects here this month inspired by Charles Rennie Mackintosh:
Self portraits

I also showed how to make a retro pincushion, like the one I made in primary school, and reviewed a book, The Fir Tree, with illustrations that took me back to that same era.

30 July 2014

This month I have been mostly...

Listening to:


Eating:
Salad! I sometimes lose my appetite a bit in the summer, so I've been trying to graze on a lot of healthy salads. I've tried various variations on panzanella and salade nicoise, and lots more. I've also been enjoying mini trifles made with yoghurt and fruit.

Watching:
Inspector Montalbano (I've seen them before but am enjoying seeing them again from the beginning, especially now that I've read the books).
Pot Luck and Russian Dolls are a couple of films I've meant to watch for years, and the third one has just come out at the cinema, so I decided the time had come to watch the first two! Of the two I enjoyed Russian Dolls best (well, any film that uses Mysteries by Beth Gibbons, one of my favourite songs, in some of its important scenes, can't be bad in my book!). I also watched Before Midnight, but didn't enjoy it as much as Before Sunrise and Before Sunset. I loved the film Hugo which I saw on TV - it made me cry, and I immediately had to go and google Georges Méliès to see how much was based on fact.

Reading:
I've done a lot of reading this month. I decided a project for this summer was to read some of the books on my "to read" shelf. It's the first time in ages I've read anything that wasn't on the kindle! The first two books I read were The Cave of the Yellow Dog by Byambasuren Davaa and Sky Burial by Xinran - both of these were about nomads, one book set in Mongolia and the other in Tibet. I found them really fascinating, and now I want to read more about nomadic peoples!

29 July 2014

Art Nouveau pendant


Ever since I got the book The Art of Polymer Clay, by Donna Kato, I've been wanting to try making an art nouveau pendant, and my Mackintosh Month seemed as good an excuse as any! I also referred to another lovely book, Art Nouveau Jewelry by Vivienne Becker, which is full of wonderful photographs of art nouveau jewellery.

I used a slightly different technique of making the wings from that described in the book, because I thought it would be quicker, but I think if I was to try it again I would do it the way shown in the book, as the lines would be crisper. I'm also not completely happy with the silver paint - it was not very opaque and did not apply very evenly. However, I'm pleased with this as a first attempt, and will try again in future!

The face was made from a mould that I'd created some years ago from a Japanese doll ornament. I decorated the wings with some beautiful irridescent eyeshadows. I added a freshwater pearl at the top, and arranged the wings to look like a sycamore seed. I had to drill a hole in the pearl, which was quite difficult as it was unevenly shaped and kept moving about in the vice as I tried to drill it!

The necklace is surprisingly light to wear - I had been worried that such a large piece would by uncomfortably heavy, but it isn't.

28 July 2014

Visiting Charles Rennie Mackintosh


I decided to take a quick trip to one of the closest Charles Rennie Mackintosh designs to where I live - a gravestone at East Wemyss cemetery that he designed. I'd never been to see it before, even though it's only a short drive from home. It was a pleasant day for a wander around the cemetery, and I found the grave quite easily from the directions in the book I have (Visiting Charles Rennie Mackintosh by Roger Billcliffe, it's an excellent book). 

The grave is for Alexander Orrock Johnston. It is really unusual in shape, wide with protruding areas at each side, and an oval in the middle with a dove above it. The inscription has been covered by a copper replacement, as it was becoming eroded, but I actually love the copper with its beautiful mint green verdigris. The lettering is beautiful on the inscription.

I also visited another Mackintosh design, which is in Glasgow. The Queen Margaret College building had been, until recently, enclosed in another building and hidden from view. Now it is visible again, but unfortunately it's on private property (I did manage to get a couple of blurry photos before a woman came out and informed me of this!). It can be seen from the footpath, though.

27 July 2014

Glasgow Rose studs

Following on from last week's stained glass style Glasgow Rose earrings, here are some stud earrings, also with a Glasgow Rose motif, which were quick and easy to make.

1. Marble together various colours of pink and red polymer clay.
2. Roll out.

3. Using a small circular cutter, make discs of clay.
4. Using the edge of the cutter, make three markings to represent the petals.

5. Bake the clay.

6. Paint some liquid clay on the back of the rose.
7. Roll a small ball of clay and place this on an earring back.
8. Smooth the ball of clay over the liquid clay, attaching the earring back to the rose (or you could glue the earring back on instead). Then bake again.


26 July 2014

No-sew bow!


Here's a quick and easy way to change up your outfits - an easy to make no-sew bow that only uses two items and just takes a minute!

To make the bow you'll need:
A scarf or fabric or ribbon
A safety pin
You can use many different types of fabric for this, but I'd recommend something quite light. For the lilac one I used a scrap piece of satin fabric about 20" x 55", for the white/red and black polka dot ones scarves of about 45" x 4", and for the plain black one a piece of 1 inch wide ribbon about 55" long.

1. Tie a bow in the middle of the fabric/ribbon/scarf
If you're using satin fabric or other fabric that has a right and wrong side, you may have to twist it as you tie the bow to ensure the right side is showing.

2. Push a safety pin through the back of the knot
You can use various sizes of pin depending on the width/ thickness of the fabric (I used a nappy pin for the lilac one).

3. Pin to the neck of your top/dress/shirt. I think it works best with a Peter Pan collar.

The great thing is that you are not damaging the scarf, so you can still use it in other ways!


25 July 2014

Book review: The Fir Tree

I came across Sanna Annukka’s art online a few months ago, and immediately ordered this book, The Fir Tree by Hans Christian Andersen, with her illustrations.

The book was every bit as lovely as I’d hoped – it’s one of the most beautiful illustrated books I own (and I have a lot!).

I’m kind of obsessed with triangles at the moment, and this book fits in well with that theme, because most of the illustrations are formed of patterns made up of lots of triangles of different sizes. Hiding in among the triangles are various birds and mice and other animals.

Some of the illustrations are in different shades of pink, purple, orange and red, and others are in blues and greens. These combinations of colours, and the retro style of the illustrations, take me back to the books of my 1970s childhood. They remind me of some of the textbooks we had at school, and of a couple of large artworks that were in the hall at my school.

Each and every illustration in the book is so perfect, I don’t think I could choose a favourite if I tried!

24 July 2014

How to take creative self portraits

I’ve been taking quite a lot of self portraits recently, so I thought I would share some hints and tips I’ve learned!

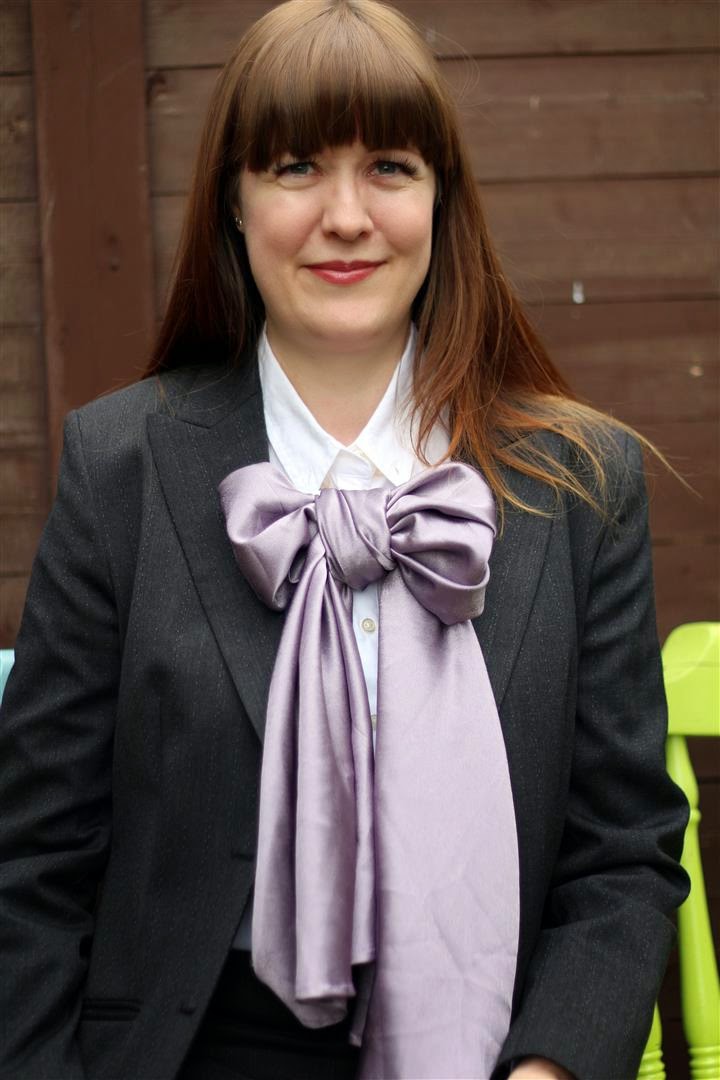
Try outfits, makeup and hairstyles you wouldn’t normally have a chance to wear. For example, false lashes sometimes irritate my eyes, so I don’t usually wear them, but I love wearing them for taking self portraits! Hats are also a lot of fun, as are umbrellas. Change outfits/accessories while your hair and makeup are done to perfection and the light is good, and take lots of photos. The more you take the better the chance of one you like.

Take advantage of good weather to take photos outdoors, or to use natural light indoors. Try taking photos in lots of different places, for example all around your house and garden, at work, in parks and gardens, and on holidays. If you’re embarrassed taking photos of yourself in public, try to find a quiet time or a secluded spot. Find interesting backgrounds, for example walls with interesting textures or colours.

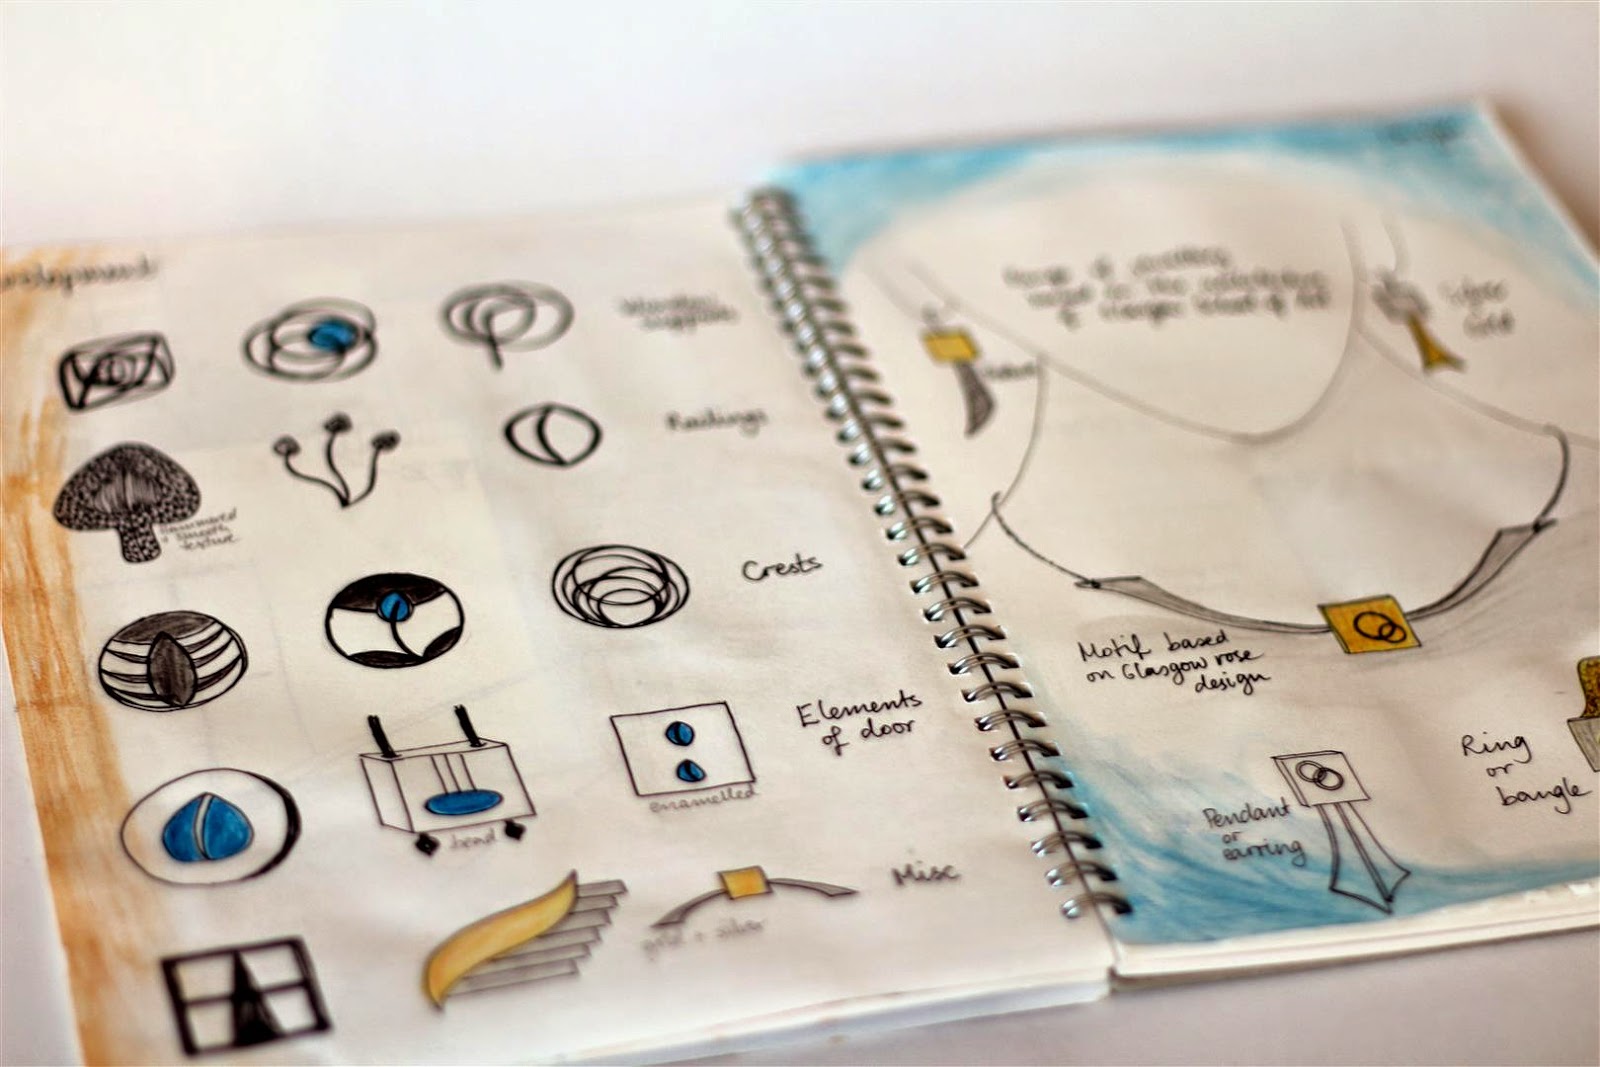
Use props that reflect your personality and interests, for example books, foods and drinks, cameras, vintage items, gadgets, sports equipment, craft tools, or whatever else you can think of! Try using props that frame your face, like old picture frames, or props with words on them, like a mini chalkboard. And you can quickly make some fun, silly props like moustaches and glasses, using some card and a piece of dowel or kebab skewer.

Remember you don’t always have to look straight at the camera and grin! Try taking some shots of yourself looking dreamily out into the distance, some of you concentrating on a book or craft project, and some in profile. Also, take some detail photos, for example of your everyday jewellery, your hands or your feet. Take pictures of your hands holding or doing something.

Themes and challenges are a good way to spark your creativity. For example, I challenged myself to produce some creative self-portraits to illustrate my end-of-month roundup posts on my blog, and I wanted them to all have some connection to the name of the blog, or theme of the month’s posts.

Learn what poses and angles best suit you, and what positions are good for your camera. If you learn the best places to set up your camera in your house and garden, and the corresponding places to stand or sit, it will make setting up to take photos so much quicker.

Try some fun ideas, like jumping in the air, or using a wide-angle lens to create distortion.

Use a tripod. They are really useful, and not too expensive. I find that the taller the tripod the better, as it gives you a good choice of angles. The self timer on the camera can be useful, but I find a remote control is much better as it allows you to take a lot of photos without going back and pressing the button on the camera. I like using the live view mode on my camera, and turning the screen round so I can see myself in it. If your camera doesn’t have this, try setting up your camera in front of a mirror, or just running back and forward after a few shots to check.

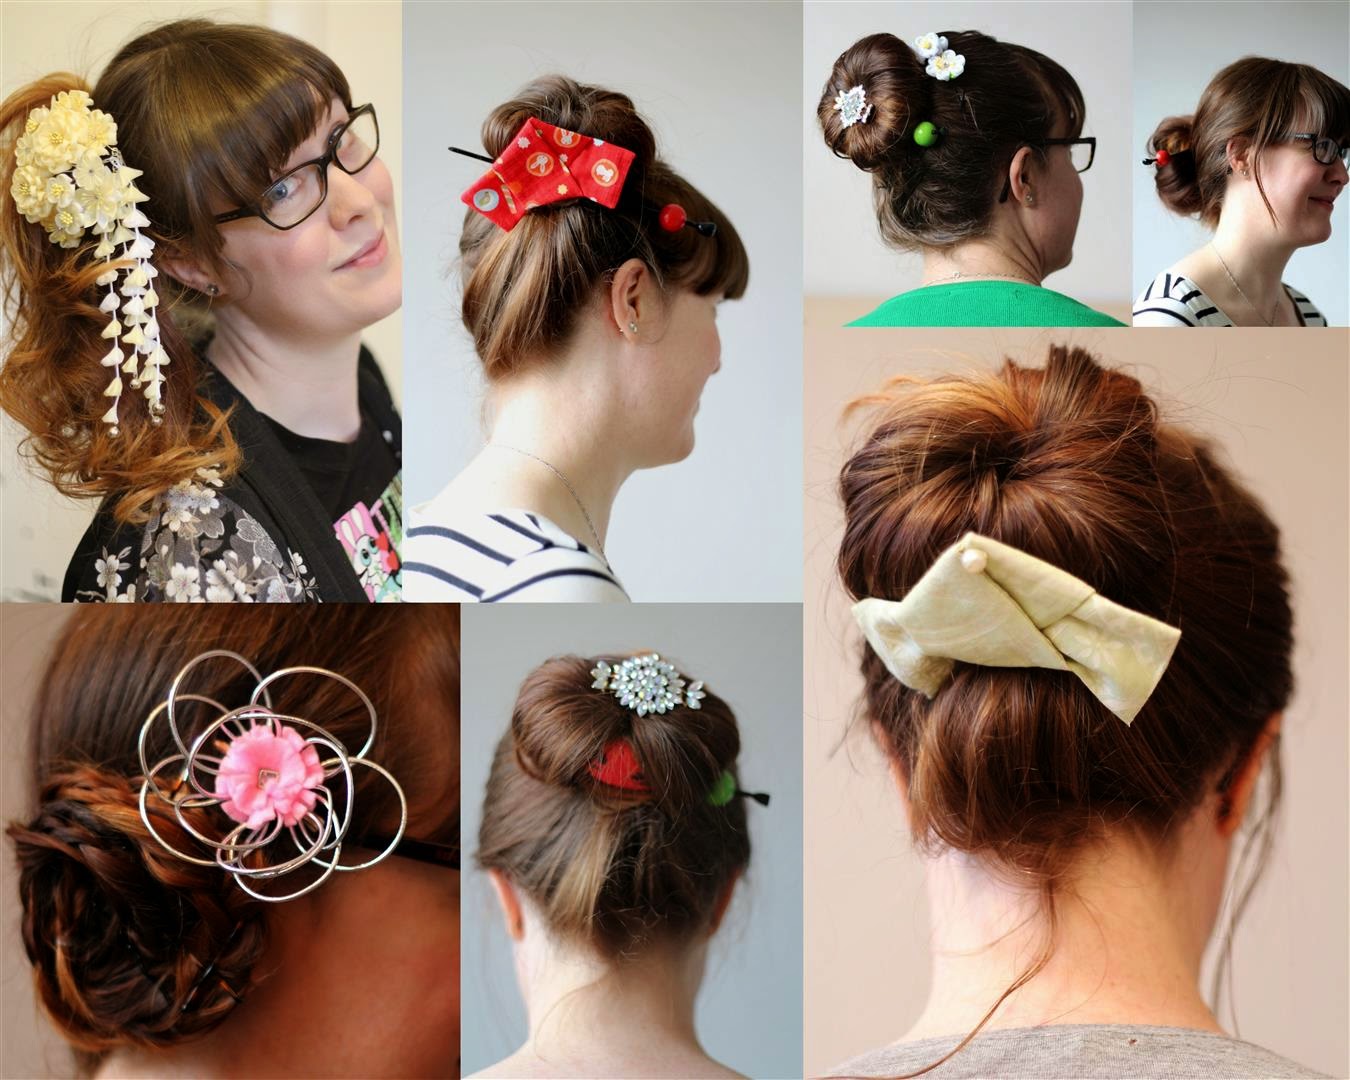
Once you’ve mastered taking photos of your front, you could try the real challenge of taking photos of the back of your head like I did for some of my kanzashi hair ornament projects! I found the best way to do this was to sit on a swivel chair, position myself in the correct place, spin around, check with a mirror that I was positioned correctly, hold the remote behind my back to take the photo, and hold the mirror up immediately afterwards to check the photo was OK!


Make use of the outtakes. Don’t throw away all the goofy-looking shots, you could make them into a fun collage or a video like I did.


23 July 2014

Triangle plant pots


I'm a little bit obsessed with triangles at the moment. It started with my Charles Rennie Mackintosh carved stamps, which then led to my phone case, and later this week I will be reviewing a book full of triangles!

Today's project is a really quick and easy one - it took longer to go and get the pots from the garden centre than it did to decorate them!

1. Cover most of the pot in a plastic bag, then tape off a triangular area

2. Spray with gold paint
3. Leave to dry
4. Remove the tape and bag
5. Fill with plants and admire your handiwork!


22 July 2014

Social media


I've finally entered the 21st century and added some social media buttons to my blog! They are across at the top of the right-hand column, if you'd like to try them out!

I started using Pinterest just a few months ago, and I love it! Then a few weeks ago I joined Twitter, set up my Emuse Facebook page, and joined Instagram. Of those three, I'm particularly loving Instagram, especially now that I have a phone with a better camera in it, and I think it will be fun for sharing some behind the scenes photos. It will take me a little longer for me to work out how best to make use of Twitter and the Facebook page. I've been a member of Flickr for a long time, and that will be where I will continue to share more photos of any events or places if there are too many to put in a blog post.

21 July 2014

Painted egg

This painted egg has a bit of history behind it!

When I was at primary school, there was a competition each Easter for the best-decorated hard-boiled egg. It was a lot of fun, with eggs decorated as all sorts of animals, people and objects, and we always enjoyed going round all the other classes to see their eggs.

When I reached the final year of primary school, I decided to make quite a subtle and artistic egg, with a painted design on it. I based the design on a painting of flowers and trellis that was in a craft book. And that year I won the prize for the best egg!

Unfortunately hard-boiled eggs don’t last very long! And I had no close-up photos of my egg. And somewhere along the way the craft book I’d taken the design from disappeared. But I never forgot my egg, and always wanted to recreate it.

This painted wooden egg was one attempt to make something similar. Although I remembered the flowers on my original egg had been blue, I decided to go for cherry blossoms instead.
The drawing was also based on the same idea, and was for a competition a few years ago at work for the best Easter egg design, which I actually won! I feel a little bit guilty about this, as the competition was really meant for the pupils, and I only entered to try to encourage them! But the pupils who were judging the competition decided to award me the prize.
After painting the egg, and doing the drawing, I finally found another copy of the craft book I originally based my egg design on, which is the Reader’s Digest Manual of Handicrafts. And I realised that the image I based my design on has a lot in common with some of Charles Rennie Mackintosh’s stencil designs (which is the connection with my Mackintosh Month!)

Now that I have the book, I look forward to sometime in the future making a true recreation of my old egg!

20 July 2014

Faux enamelled pendant

A couple of years ago I made some sketches of Glasgow School of Art, Charles Rennie Mackintosh's most famous building, and came up with some jewellery designs inspired by these sketches, but until now I hadn't turned any of them into real jewellery. One of the ideas was a pendant based on the lantern outside the main entrance, and I have now made this design from polymer clay.


Here's how I made it:
1. Mould white polymer clay into a flattened square shape

2. Poke two holes through 

3. Use an oval bead to make a depression in the surface

5. Use a knife to cut lines between the depression and the top

6. Break up some blue clay and mix it with liquid clay

7. Paint this into the depression and bake the bead 

8. Varnish over the blue area. I also sanded the bead with quite coarse sandpaper to give a matt effect.

9. Thread small blue beads onto two head-pins, place these through the two holes in the bead, and thread onto a necklace wire.


Related Posts Plugin for WordPress, Blogger...