.JPG)
Here’s how I made some fun paper kanzashi! They are not very
robust, and they blow about a lot in the wind, but they are fun to make and to
wear!
All you need is a few sheets of normal white paper (the sort
you would use in your printer) a needle and thread, some normal glue and hot
glue, and a hair clip of your choice!
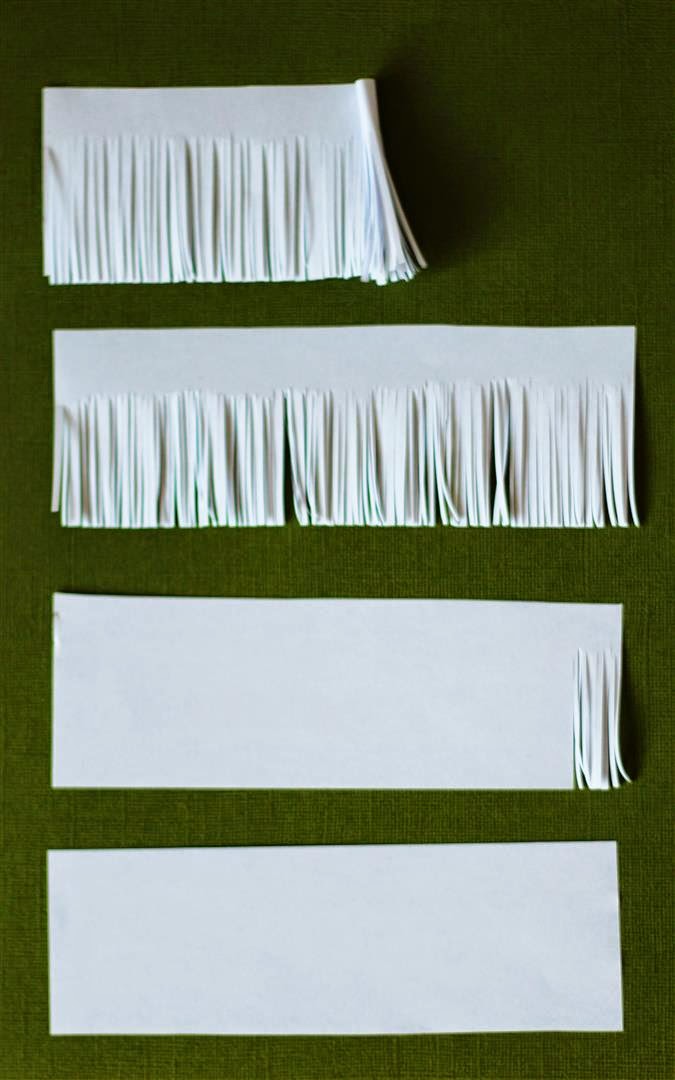
1. Cut a strip of paper 2 inches by 6 inches
2. Cut a fringe along one side of the paper, going about 2/3 of
the way up
3. Roll the strip up
4. Add a little glue at the end to secure
5. Run the blade of your scissors over the fringe to make it flare out
When you have three or more of these made (I made 8 for
mine), you are ready to make a flower to go at the top.
1. Make the centre of the flower in exactly the same way as
the dangles
2. Cut 3 flower shapes, each about 3 inches across
3. Squeeze the petals to give them some dimension
4. Layer the three flower shapes on top of each other, making
sure the petals are not in line with the other layers
5. Using sharp scissors, poke a small hole through the three
layers
6. Insert the flower centre through the hole
7. Add some hot glue at the back to keep it in place
8. Hot glue on your hair clip
Now to join them together!
1. Take a needle and thread and tie a knot in the end
2. Sew one of the dangles onto this
3. Decide how far you want the dangle to dangle, and sew the
other end of the thread to the flower at the top.
4. Repeat for all the dangles
Now it’s ready to wear. Enjoy!
.JPG)
.JPG)
No comments:
Post a Comment